
Bakery Business Guides
The Cottage Baker Starter Kit: Buy This First, Buy This Later, Skip This for Now
Oct
This post contains affiliate links. If you buy through them, I may earn a small commission at no extra cost to you — it keeps the printables coming! As an Amazon Associate I earn from qualifying purchases.
You do not need to buy everything to start
Friend, can I save you some money and a whole lot of overwhelm?
If you are looking at cottage baking and thinking, “I would love to earn a little extra for our family, but I can’t afford a whole new kitchen first” — I understand. Extra money for a family vacation, a birthday party, Christmas gifts, soccer lessons, or music lessons would help so many families. The last thing you need is a shopping list that eats the profit before you make your first sale.
You do not need to start with everything. I didn’t.
In fact, before I sold a single cookie, my very first sets were bee cookies for my mother-in-law — she’s a beekeeper, so bees were an easy theme. I made them with a friend who has pretty handwriting, because she could do the lettering I couldn’t. And full honesty, because we’re friends here: I did not use food-safe crinkle paper in that box. (She did, in fact, survive.) That’s what a real beginning looks like — borrowing a friend’s handwriting and learning as you go.
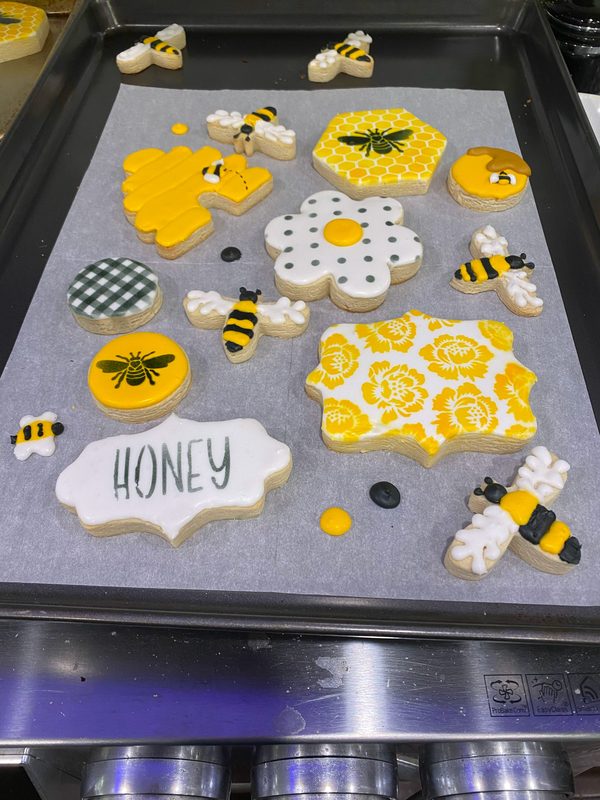
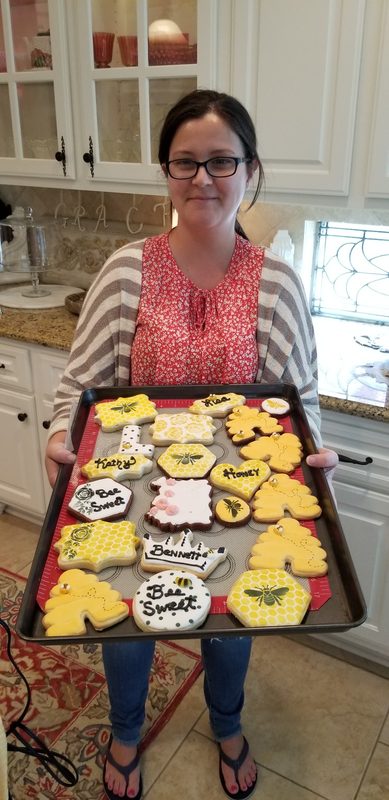
My first year was simple on purpose. I used the mixer I already had, a few basic supplies, tags I designed myself on a free account and printed at home, and products that were forgiving while I learned.
Then my little business did something wonderful: it started paying for its own upgrades.
That is the heart of this kit. Three lists, in the order I wish somebody had given them to me:
- Tier 1 — Start here
- Tier 2 — Buy from profits, or ask for as gifts
- Wait — Skip this for now
And later still, when you are ready: the design tools, a 3D printer, and a big purchase that must have a plan to pay for itself.
Sell this first: drop cookies or DIY kits
If you are choosing your very first product, start with something friendly.
Drop cookies are a kind first sale. They are familiar, forgiving, and do not ask you to hand-decorate every single cookie like a pro on day one.
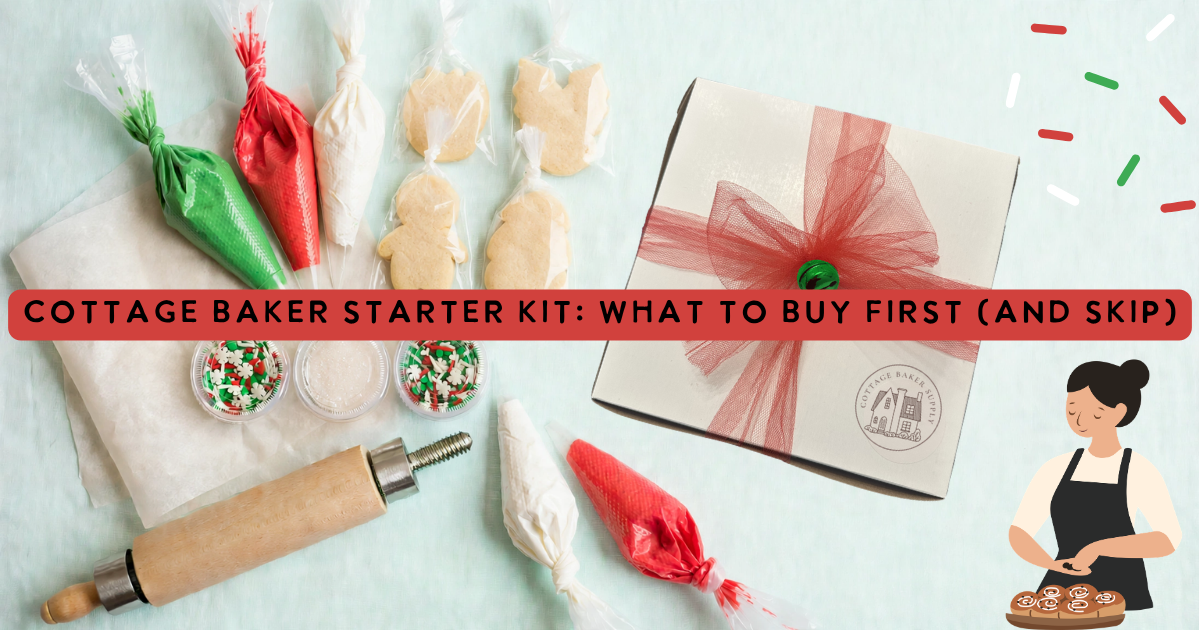
DIY cookie kits are my recommendation going into the holidays. A DIY kit gives a family something fun to do together. You bake plain cookies, include icing and sprinkles, add simple instructions, and the customer gets to do the decorating. You do not have to be the world’s fanciest decorator for a family to have a ball with your kit.
That first year, I sold elf pizzas, elf donuts, and DIY kits.
Where did my first customers come from? Nothing fancy, and no paid ads. I signed up for a very small neighborhood market, and I made Facebook posts to friends and to the moms group in my neighborhood.
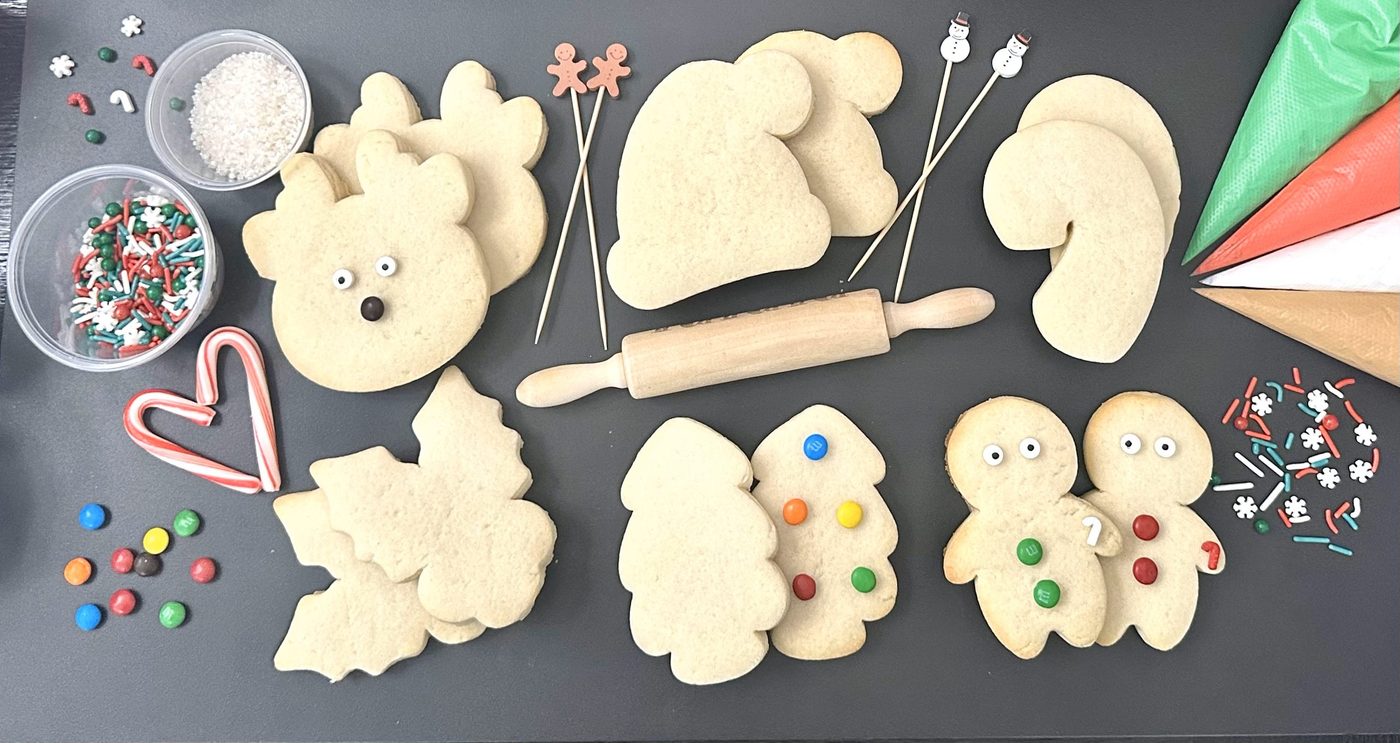
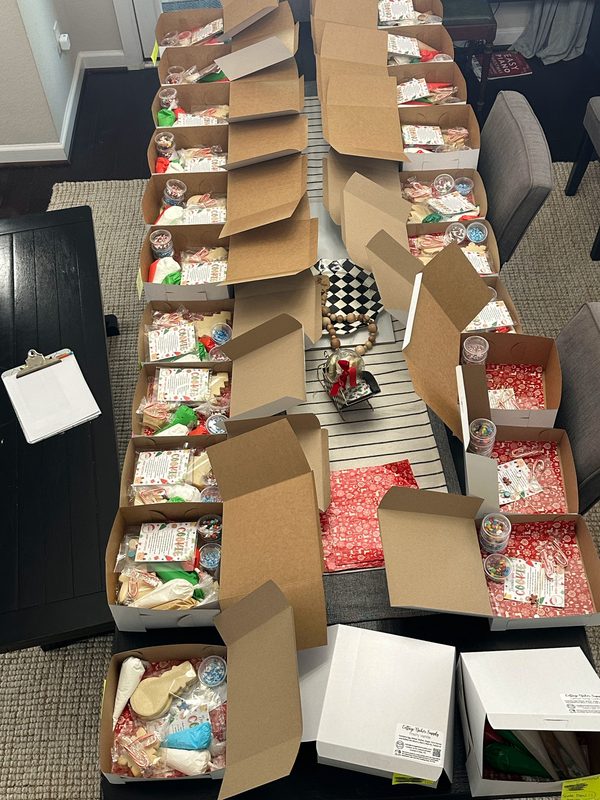
Start with your own circles. The moms who already know and trust you are a wonderful place to begin.
Tier 1 — Year 1: use what you have
Here is my real first-year DIY kit setup. It was deliberately minimal.
The mixer you already own
I started with my KitchenAid stand mixer — the one I already had.
If your kitchen already has a stand mixer, use it. Please do not let anybody talk you into a bigger mixer before you have sold a single cookie. A bigger mixer can be a great later upgrade, after orders are really coming in and batch size is your actual problem.
Parchment paper
Parchment paper was a basic I used right from the start. It makes baking and cleanup simpler, and a roll or a pack can carry you through a lot of learning.
Icing bags — get two sizes
For icing bags, I recommend two kinds, and I use them together like a little assembly line:
- The 16-inch bags are my batch bags. I load a whole batch of a single color into one big 16-inch bag, and then I use that bag to fill the smaller kit bags. One color, one big bag, no scooping and re-scooping out of a bowl.
- The 12-inch bags are the kit bags — the ones that go in your DIY kits. I line the empty 12-inch bags up in kitchen glasses (yes, drinking glasses — they hold the bags open and standing up), and then I fill them assembly-line style from the big batch bag.
Two more things that make this fast and consistent:
- I figure out ahead of time how much icing each cookie needs in each color, and then I use a kitchen scale to measure as I go — every kit bag gets the same amount, and I’m not guessing or running short on the last kit. (This is the scale I bought — it’s small enough to tuck away in a cabinet, it’s easy to wipe clean, it does grams and ounces, and the tare feature is the helper here: it zeroes out the weight of the glass, so I’m only weighing the icing going into each bag.)
- When a bag is filled, the Innoseal bag sealer (my Tier 2 sealer, down below) makes quick work of closing it.
These are the combo bags I buy — the pack includes both sizes
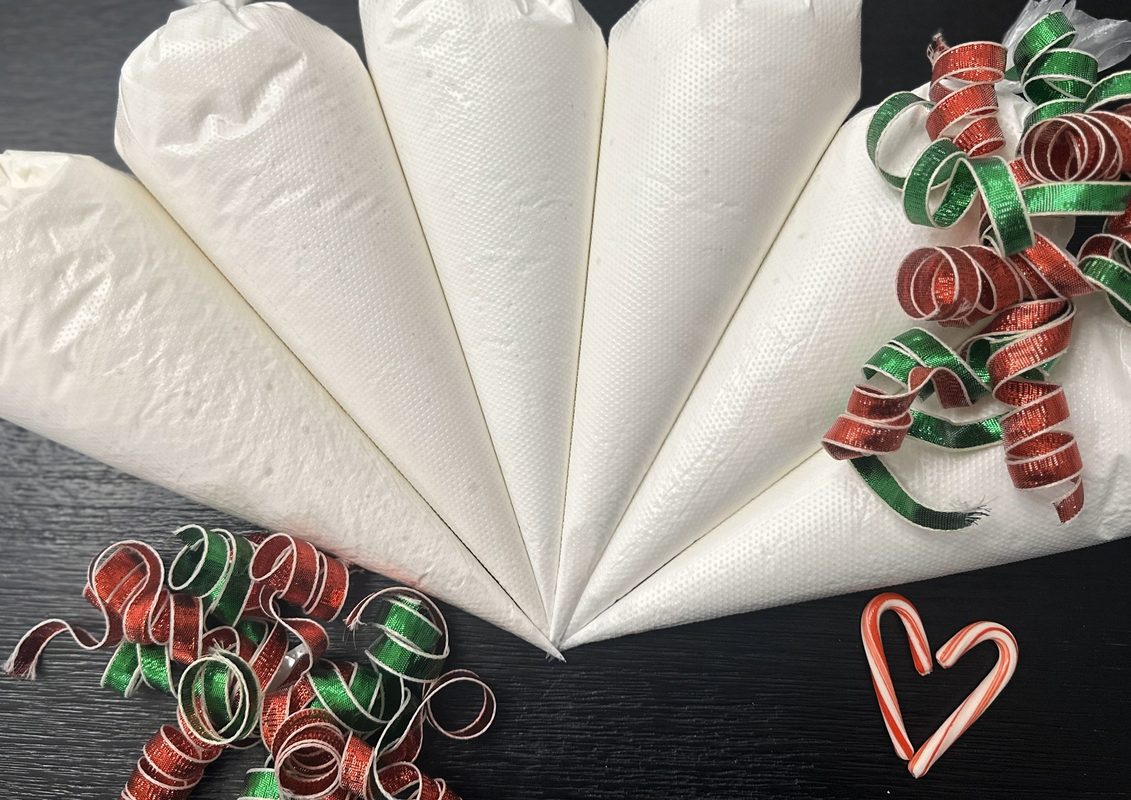
Why 12-inch for the kit bags? The 12-inch bags hold more than an 8-inch bag, and I usually just trim off the excess bag a little bit. I found that if I bought 10-inch or 8-inch bags, they were much harder to fill — the opening was smaller — so I stick with 12-inch. You can also tie the 12 inch in a knot depending on how much icing is in there, which makes for a cute presentation, and no need for the bag sealer.
One bread bag for all 12 cookies
This is where my first-year kits were extra simple: I did not bag every cookie separately in that first kit setup.
I used bread bags to hold all 12 cookies together.
One kit, one bread bag of cookies, nice and simple. Individual bags and sealers are wonderful — I use them now — but they are a Tier 2 comfort, not a requirement for proving that people will buy your first kits.
Jello-shot containers for sprinkles
For the sprinkles, I used small jello-shot containers. Small, cheap, and just right for giving each kit a few fun sprinkle choices without buying fancy packaging.
The sprinkle containers I use are here: sprinkle containers
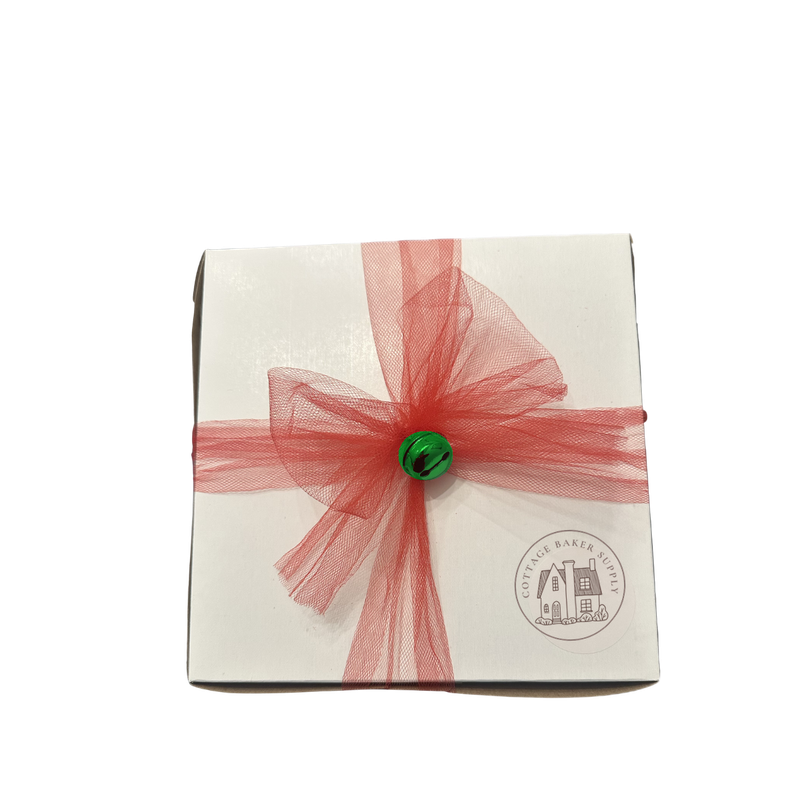
A white cake box
Everything went into a white cake box.
Not a custom box. Not a giant case of seasonal packaging I had to use up or lose money on. A clean, plain cake box that lets the cookies be the cute part.
One label and one instruction sheet
Each kit got:
- One label on the box — my ingredient tag goes in the corner of the box
- One printed DIY kit instruction sheet inside
That is it. That one corner tag can carry your business name and the label information your state requires — always check your state’s label rules and use the free Label Generator linked in Part A, so the legal part is right and the box still looks sweet.
A red tulle bow and a jingle bell
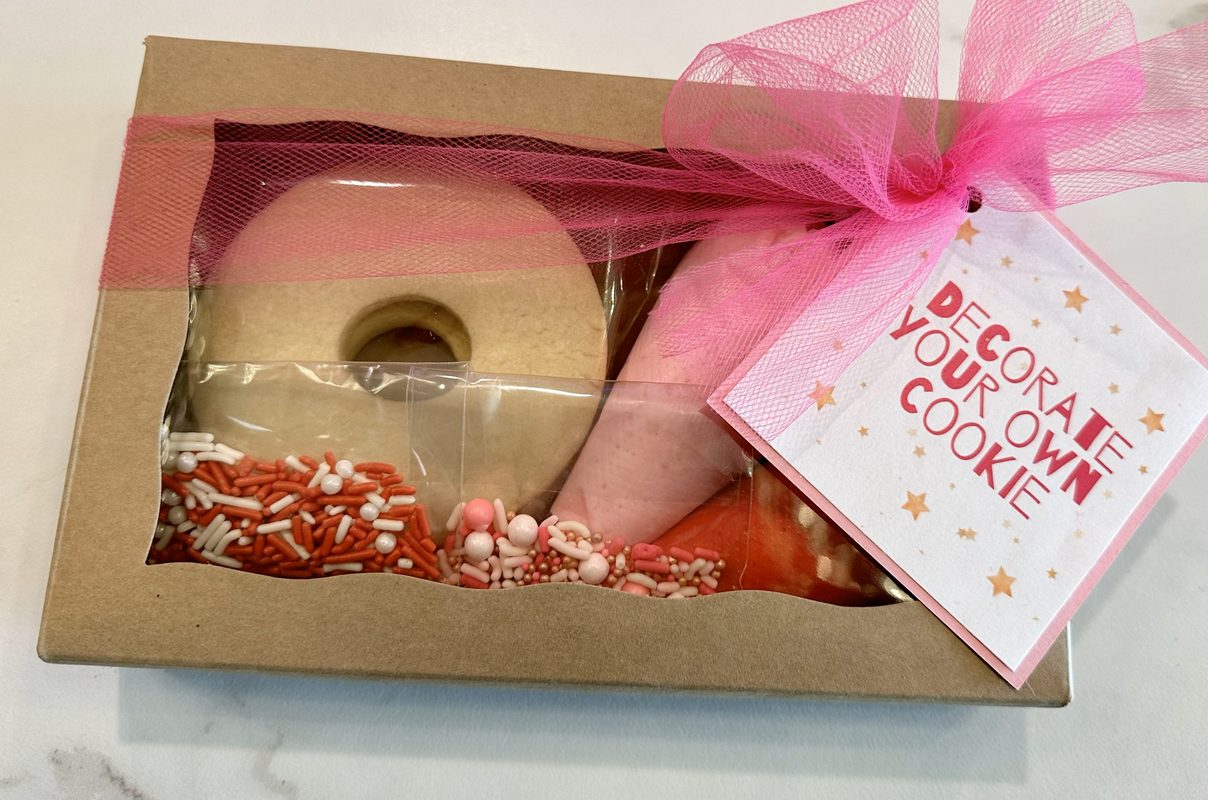
I tied the box with a red tulle bow and a green or silver jingle bell — and my bow ties all the way around the box, tulle wrapped right around the whole box and tied on top, not just a little bow stuck on.
Simple, festive, and cute enough that the kit felt like a gift the moment a customer picked it up. You do not need ten kinds of ribbon to make a box feel special.
Tags I designed myself — free Canva, printed at home
Here is one of my favorite first-year savings: I designed my own tags on a free Canva account and printed them at home.
No designer fee. No print-shop minimum. And when I wanted to change something, I could fix it myself and print another sheet.
If you are crafty — and if you are reading this, I bet you are — that skill you already have is not “extra.” It is one of the ways you will make your products look pretty without spending a fortune.
Elf pizza boxes from Amazon — buy a small pack to test
That first year I also sold elf pizzas, and the mini pizza boxes came from Amazon.
Buy a pack sized for testing an idea. Please hear me on this one: a seasonal box that does not sell is not a bargain in a bigger case. It is money sitting on a shelf. Small packs let you try a cute idea, learn whether your customers love it, and order more only after they do.
The rolling pin is necessary
If there is one “do not just use whatever rolling pin happens to be in the drawer” item in Tier 1, this is it.
This rolling pin is necessary, because it allows you to create cookies that are all the same thickness — which is essential in a DIY kit.
In a kit, every cookie needs to match. Same thickness means they bake the same, stack the same, and look like a set when the box is opened. One thick, doughy cookie and one thin, crispy cookie can make a whole kit look off, even when everything else is darling.
My thickness rule — spoil them, or stretch the batch
This rolling pin also taught me that thickness is a choice you get to make for the order in front of you:
- If I want to spoil the customer, I go 3/8″.
- If I am trying to make as many as possible, I do 1/4″ — and no one complains.
Thicker cookies feel generous. Thinner cookies let one batch go further. Neither is a failure. Just know which one you are selling when you price it — a thicker cookie, and a bigger cookie, uses more dough. We will come back to that in pricing below.
Warning: do NOT buy the pop-off kind — I bought both, that’s how I know
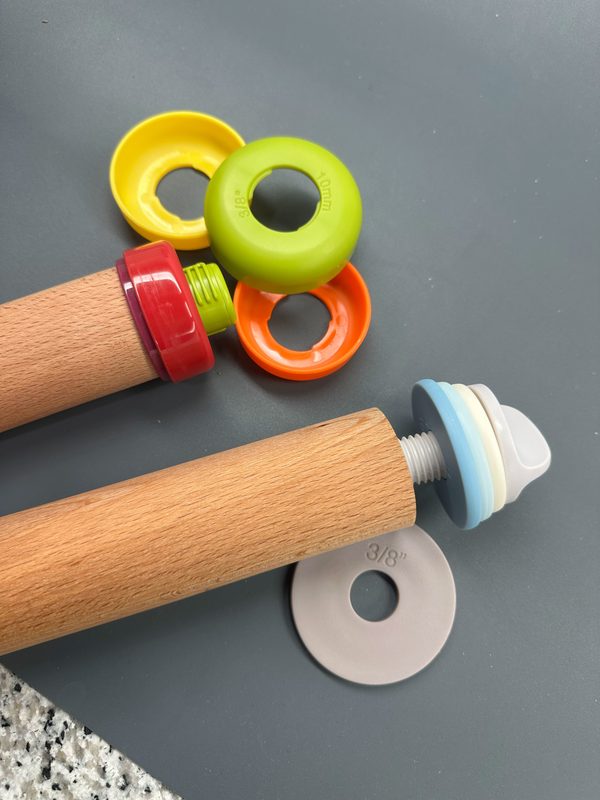
Please do not get the rolling pin with the ends like the colored-rings / end-cap style in the photo I shared. The ends pop off easily.
The rolling pin that has the adjuster that screws into the center is best. That screw-in style is the one my link above points to.
I am telling you this the expensive way so you don’t have to learn it the expensive way: I bought both. That’s how I know.
It has great reviews on Amazon, but trust me — sort to the one-star reviews. I’m not crazy. The one-star reviews are where baker after baker says the ends and guides pop or fall off while she is rolling. Learn from us, buy the screw-in one once.
For identification only — this is the style to recognize and avoid, NOT a recommendation and not a shop pick: the “bad one” Kathy flagged is at https://link.amazon/B05bEWb8C — please do not buy this one thinking it is the pin recommended above.
A quick, practical caution about pans and your fridge
Before you buy pans — especially before you buy half-sheet pans, or a stack of extra pans — measure first.
Not as big a deal with cookie kits, but most sugar cookies require some fridge time — so make sure your pans can fit in your fridge.
That is not a scare, just a check-first step that can save you a very annoying surprise on bake day. Open your fridge, look at the shelf you would actually use, measure the width and depth, and check a pan against that space before it is in your cart. A wonderful pan that cannot slide into your fridge at home is not a wonderful pan for your kitchen.
And measure your fridge — do not assume a half-sheet pan fits every kitchen, because fridge style changes what fits.
My sister has a side-by-side freezer/fridge combo, so her fridge side is narrower, and a wide pan can be a tight squeeze in there. I have a bottom-mount freezer with French doors, so my fridge opens up wide, with a full-width space inside.
Same pan, two very different kitchens. So before you buy, think about both: the measurements inside your fridge and your door style. A side-by-side may need a smaller pan, or a pan turned a different way, where a French-door fridge can take that wide pan with room to spare.
If the pan you already own fits, start there. If a bigger or extra pan is on your wish list, let “it fits in my fridge, with room for my family’s food, too” be one of the boxes it has to check.
And if you outgrow your family fridge someday? That is a good problem — and it has a profits answer, too. 100 elf pizzas can buy you an extra cookie fridge. A dedicated fridge just for cookies is not a starter purchase. It is exactly the kind of upgrade a best-selling seasonal product can pay for later, after it has earned it.
How I priced my DIY kit — and why you should not copy my price
My DIY kit was $36 for a dozen.
Please do not just copy $36.
Use my number as a learning example, then run your kit through the calculator:
Your supplies will be different. Your cookie size will be different. Some of the cutters I use are super big, so they use more dough. A bigger cutter, or a thicker 3/8″ cookie, can change what a batch costs and how many cookies one batch makes — so it has to change the math.
My pricing formula is:
3x the cost of ingredients at FULL price + packaging & labels + overhead + your hourly wage
Two parts of that deserve a little extra love:
- Use full price for ingredients, never the sale price. If you price a recipe off butter you caught on sale, the customer learns to expect that price — and next time, your butter is back at regular price and you are the one losing money.
- Do not forget packaging, labels, and overhead. The box, the bags, the sprinkles containers — and overhead, including dishwashing. Friend, dishwashing is a cottage baker’s biggest chore, and your price is allowed to know that hot water, soap, and time are real costs.
Your price should pay you. That is not greedy. That is how this stays fun and worth doing for your family.
Boo-boo fixers — tools that rescue a mistake
Some of my favorite tools are not “pro tools.” They are confidence tools. They fix the little things that used to make me think a batch was ruined.
Cookie Countess grater — for icing that runs off the sides
I use this Cookie Countess grater to clean off any icing that runs off the sides.
Remember, I’m not a pro baker, just winging it. This tool helped me clean up my boo-boos — and a beginner who can neatly fix a runny edge gets to keep her confidence and her cookie.
Warning: it is sharp. Be careful not to scrape your knuckles. Go slow with it, please.
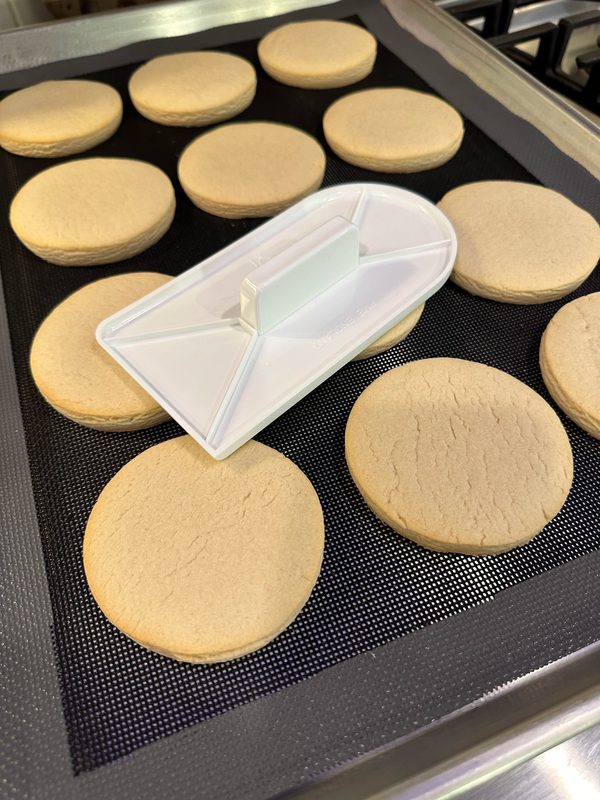
Ateco Fondant Smoother — my “cookie iron”
My “cookie iron” is really an Ateco Fondant Smoother — that is the product name to look for, “cookie iron” is just what I call it.
I use it to flatten cookies fresh from the oven. It is a fondant tool doing a cookie job, and a good reminder that one tool can have more than one use in a home bakery.
Wish-list upgrade: magnetic measuring spoons
You most likely already have measuring spoons in a drawer somewhere. Start with those. You do not need new spoons to make your first sale.
When you are ready for an upgrade you will actually feel every bake day, these magnetic measuring spoons are amazing:
- Double-sided
- Dishwasher safe
- The scoop is elongated on one side, so it fits inside spice containers
- Handy to measure wet ingredients on one side and dry on the other, if needed
They nest together magnetic, so they are not rattling all over the drawer, either. You will love them — or they make a perfect little spoil-yourself gift to put on your list after your first order. Around the holidays, this is exactly the kind of thing a husband can put in her stocking.
Tier 2 — Buy this from profits, or ask for it as a gift
This is my favorite tier, because this is where my story changed.
That first year, I sold elf pizzas, elf donuts, and DIY kits. From the profits, I was able to buy better tools. And some supplies, I asked for as gifts — which is a perfectly smart way for a baker to build her kit without every single upgrade coming out of the grocery money.
Notice the order, though: these tools came after people were already buying. They made the work faster and nicer. They did not make the first sale happen.
Bosch mixer — buy the white one
From my cookie profits, I bought a Bosch mixer — it could do a quad batch of dough. When you are making batch after batch, that kind of capacity is a real gift.
Two money-saving notes from my own kitchen:
- Mine is the stainless steel model. Buy the white one instead. The difference between the stainless and the white is cosmetic only, and stainless is more expensive. Same work, less money — take the white.
- Use the dough hook to make and mix cookie dough. You do not need the cookie paddles. The dough hook does the job. The cookie paddles go straight to my Wait list below.
Cookie Countess mats on Nordic Ware pans
From that season, I also asked for cookie supplies — including Cookie Countess perforated baking mats, which I use on my Nordic Ware half-sheet pans.
A mat-and-pan setup you love baking on makes a long bake day so much nicer. Just remember the fridge check from earlier in this post before you add pans: measure your fridge interior, think about your fridge door style — side-by-side versus French doors really can change what fits — and only then choose your pans.
Two sealers, two different jobs
Do not let anybody mix these two up, because they do different work in my kitchen:
- Heat sealer / impulse sealer — this is the one I now use to seal each cookie individually.
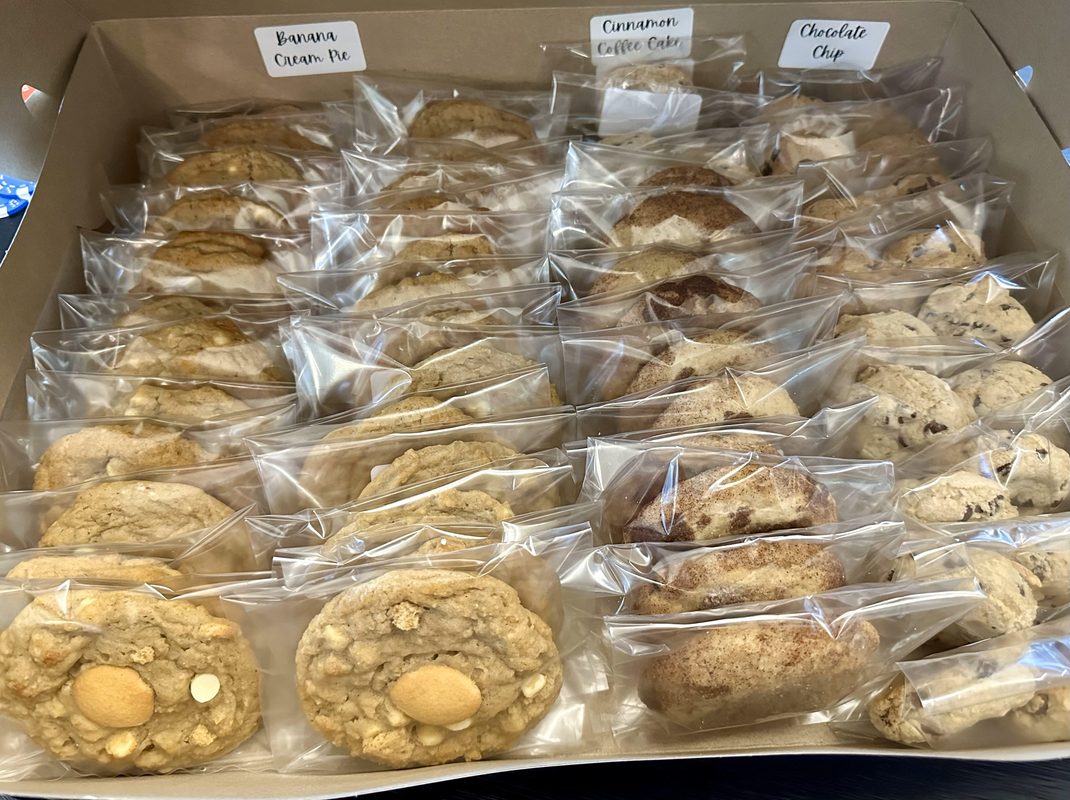
- Innoseal bag sealer — this is the one I used for the bread bags and the icing bags.
Individually sealed cookies came later for me. They are a lovely upgrade for freshness and presentation. Your first kits, with all the cookies together in a bread bag, can still be sweet, legal, and sellable.
Bubble mailers — plain white is the smart everyday pick
When you are delivering orders, a good bubble mailer helps.
My general recommendation is the plain white bubble mailer, because you can put a cute sticker on the outside and make it work for any holiday. That is my favorite kind of supply: one plain, useful thing, and the seasonal part is just a cheap sticker you change.
I also like this gift-design bubble mailer — it is pretty, and it does look like a gift. It is holiday themed, though. Enjoy it for the holidays it fits, and let the plain white one be your year-round workhorse.
Cookie delivery bags — for big orders and vendor events
These cookie delivery bags are for carrying bigger orders and getting your cookies to vendor events safely and neatly.
You do not need delivery bags before you have a big order to deliver. When that happy day comes, you will be glad they exist.
Wait — skip this for now
Every beginner deserves a Wait list that is just as honest as her shopping list. Here is mine.
Airbrush
I asked for an airbrush — and I rarely used it.
That does not make it a bad tool for somebody else, someday. It makes it a perfect example of a tool that should wait until you have a real, repeating reason to reach for it. If a tool is going to sit in a cabinet while your hard-earned money sits in it with it, it can wait.
Cookie paddles for the Bosch
Skip them. Use the dough hook for cookie dough. I do.
The stainless finish premium
Skip paying extra for a finish. The white Bosch does the same job. Spend the difference on ingredients for an order somebody has actually placed.
The lesson in every Wait item is the same: the base tool usually works. It is the add-on, the pretty finish, and the used-once gadget that can wait for profits, a gift, or a really good reason.
Year 2 — Creative Fabrica, freebies first
The next year, I upgraded to a Creative Fabrica account.
I use it almost exclusively for new fonts and graphics, and it is worth the price for me — because I do not just use it for cookies. I use it for shirts, tags, cookie prints on my Eddie, cards, website stuff, and more. A tool used that many ways, that often, can earn its keep.
But hear the timing again: Year 1 was a free Canva account and printing at home. Creative Fabrica was a next-year upgrade, after income had started.
And you do not have to pay on day one here, either. Creative Fabrica has tons of freebies. Start there. Download the free fonts and graphics, use them on real tags and real kits, enjoy them — and then decide, from experience, whether a paid account will be worth it for you.
Next in my timeline — a 3D printer (before the Eddie)
We also bought a 3D printer before the Eddie, because cookie cutters are expensive.
Think about what happens when you need one cutter in one shape:
A lot of the time, “free shipping” on cookie websites had a minimum purchase. So if I only needed one cookie cutter, I was either overbuying other things to meet that threshold — or paying for shipping on something that weighed nothing.
With a printer, I could make my own cutter from a design instead: Creative Fabrica design → Silhouette Studio → CookieCAD → print the cutter.
It let me take more last-minute orders, too, because I did not have to wait for a cutter to ship, or try to take a kid to a store to find one.
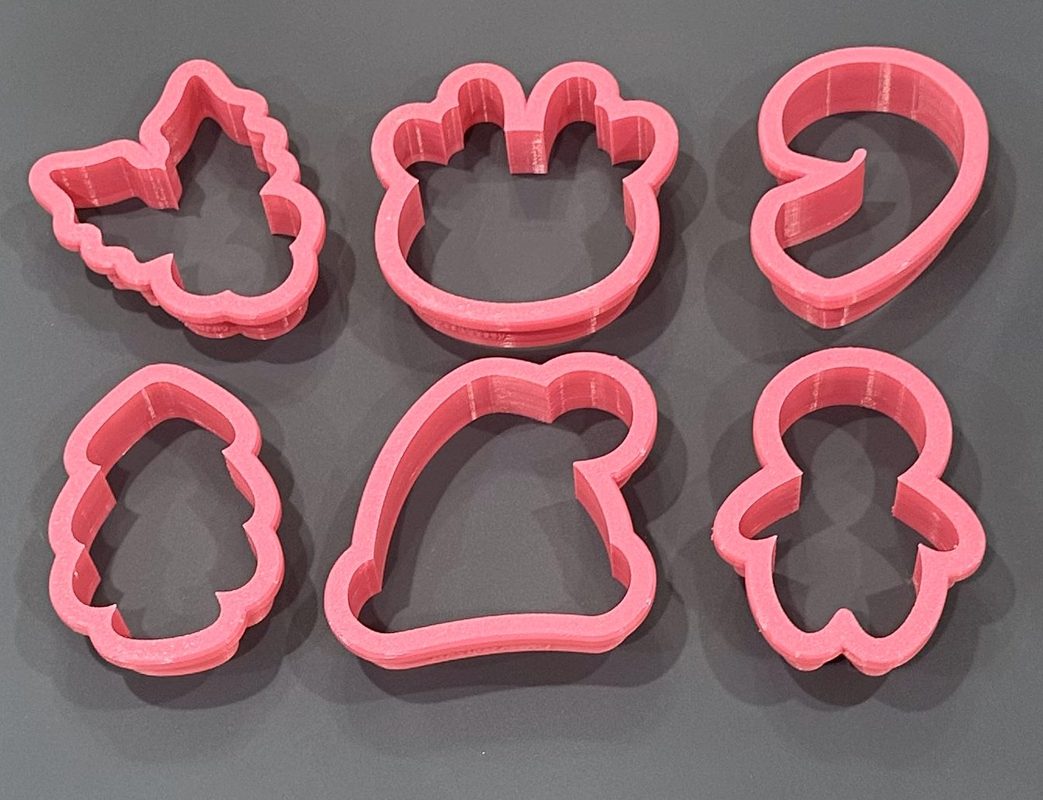
I could design at nap time, put it on the printer to print, and it would be ready by bed time.
That nap-time-to-bedtime timing is real mom life, and it is why this tool fit our family so well.
How to choose a 3D printer — general guidance, no specific model from me
I am not linking you to my exact printer. The one we bought is no longer available, and we have even talked about upgrading ours. A specific model link from me would not help you for long. These are the things I can teach you to look for:
- Use food-safe PLA to print the cookie cutters.
- Look for a printer that is self-leveling / auto-leveling. That leveling part is the tricky part we read about, so let the machine help you with it.
- If you have a baker’s man, talk to him about it first. Ask what he would want to use one for, and let him help guide that purchase. It might even be a good gift for him.
My husband was hesitant at first — but then, when he saw the file libraries, he couldn’t help himself. He has used ours to print Pokemon balls, a wand stand for our son, cookie cutters, and other random things. It stopped being “a cookie tool” very fast, and became a household tool the whole family enjoys.
That multi-use test is a good one for any bigger tool: will it only do one job, once in a while — or will your family reach for it again and again?
Later, and only with a plan — the Eddie
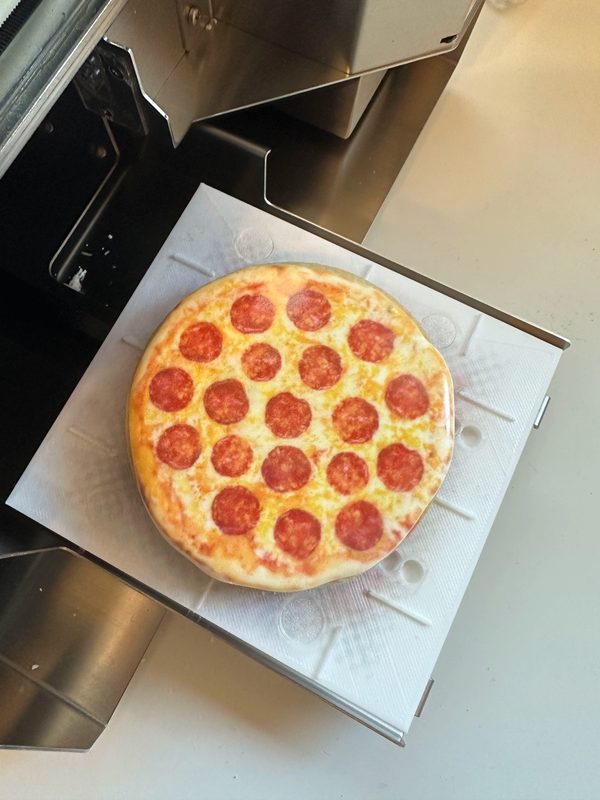
A later year, I took the profits from cookie orders and bought the Eddie.
Please put this purchase in the right place in your mind: not Year 1, not on a credit-card hope, and not just because it is exciting. It was a profits-funded upgrade — and it paid for itself the first Christmas, with one product.
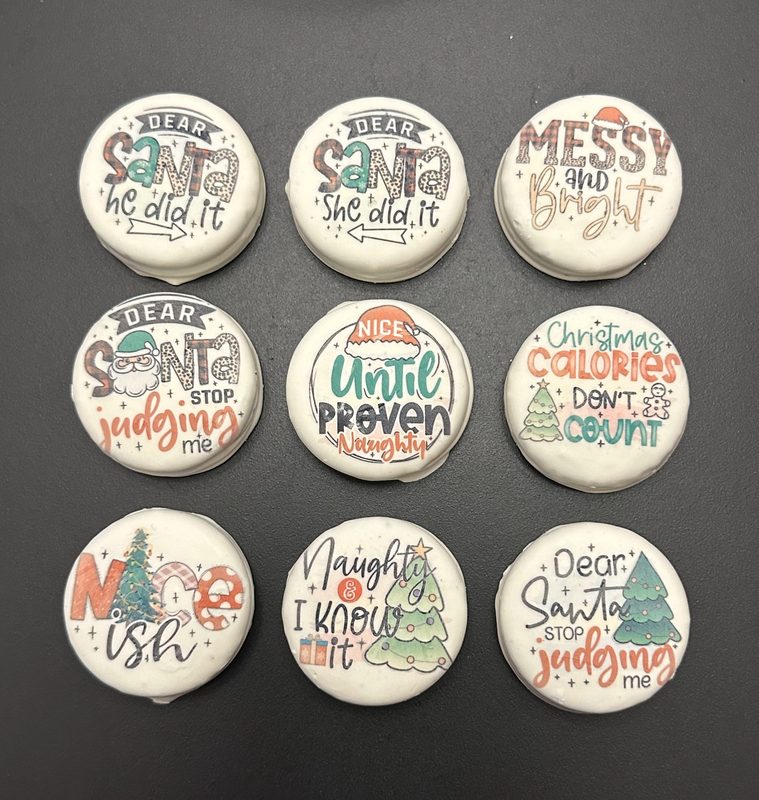
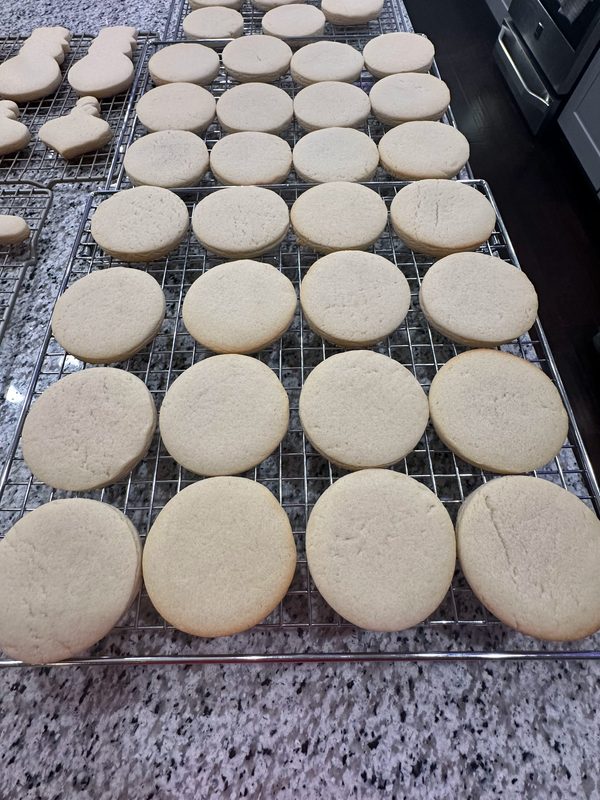
Here is that product. They were so easy to make:
- A Creative Fabrica file set
- Premade white fudge Oreos, bought off the shelf at the grocery store
- A pretty box, lined with parchment
No baking those cookies. No dipping them. Print, box, sell.
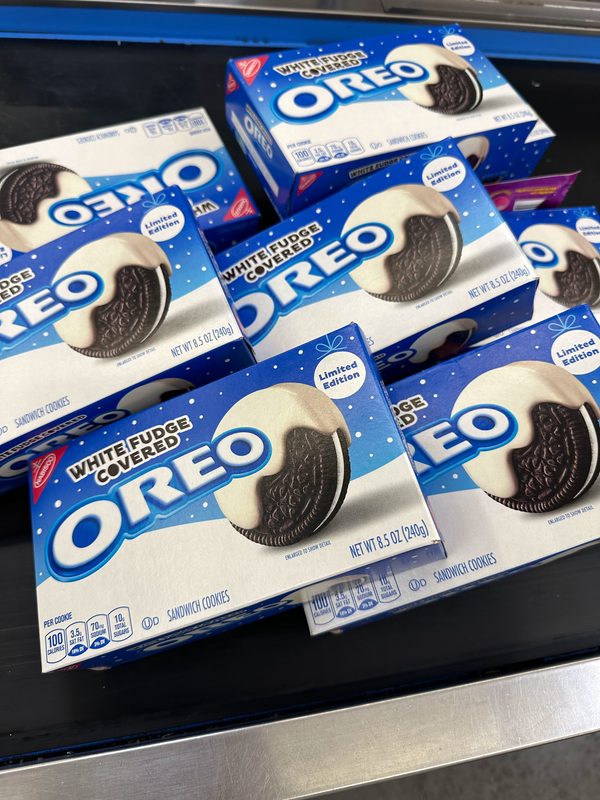
I sold 100 sets of 3 dozen cookies for $30 each that Christmas. That is 300 dozen cookies, from one easy product, in one season.
Before any big purchase, ask my two questions
- Can I pay for it from profits, not from the family budget?
- Can I name the one product — and the season — that will pay for it?
If the answer is yes to both, like it was for the Eddie and those Christmas Oreos, a big tool can be a smart next step. If the answer is no, it belongs on the Wait list, with the airbrush. There is no shame in waiting. Waiting is how you protect the money your family needs.
What the Eddie made possible: larger orders, in mom-sized days
The Eddie also allowed me to take on larger orders — not by working one giant, exhausting day, but by splitting the job up:
- Bake the cookies one day
- Ice them all the next day
- Print them all the next day
- Dry 24 hours
- Bag them, ready for pickup Thursday night, or Friday / Saturday
One job per day. Each day is doable around family life. A large order stops looking so scary when you can see it as a row of small, ordinary days.
One good group can come back again and again
With that system, I did several orders for the High School football booster club.
And here is a legal part I want you to copy exactly: the school district gave me permission to use the logos. Ask first. If you want to put a school, team, company, or any other logo on a cookie, get permission to use that logo. Great logo orders are not worth doing a logo the wrong way.
Those booster club customers came back again and again. And then they came back again — for Christmas orders for the businesses they owned, too.
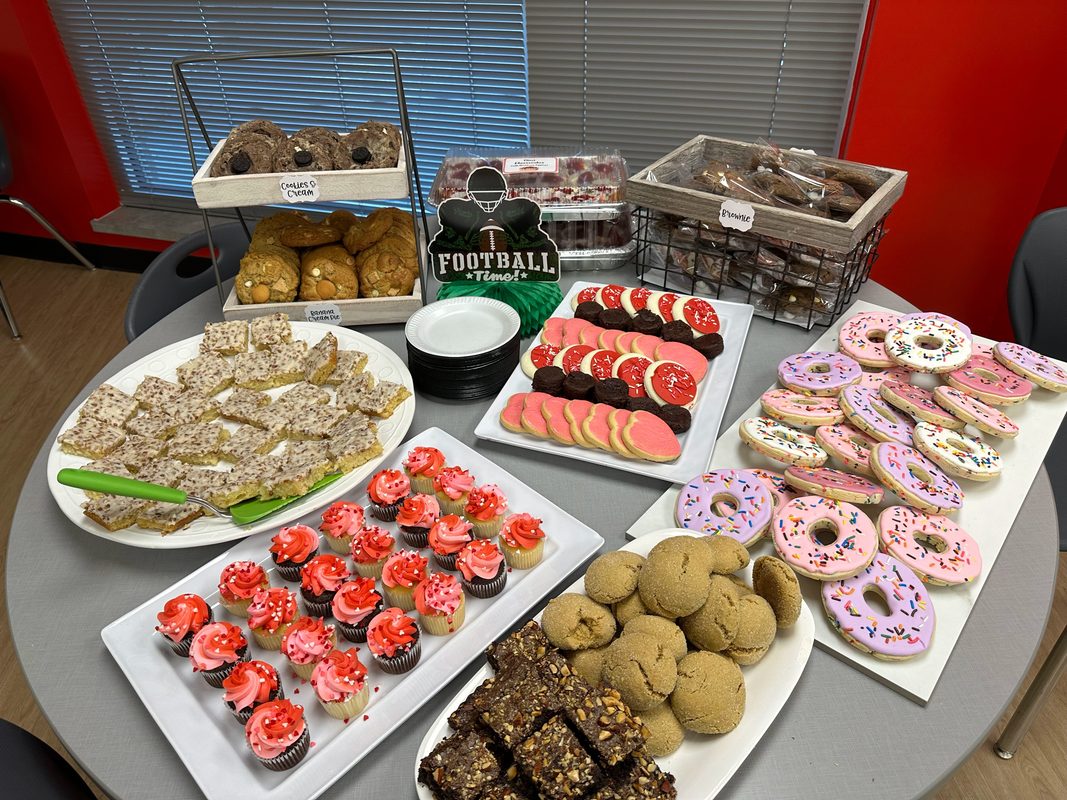
One relationship, cared for well, turned into repeat school orders and then business orders from the same people. You do not have to chase everybody. Take wonderful care of one group, and watch what grows from it.
Start where you are
If your kitchen table today holds a mixer you already own, a bag of flour, and a head full of ideas that feel a little scary and a little exciting at the same time — you are not behind. You are exactly where I started.
Buy the few things that make your first product good. Use the spoons and pans you have until they are truly in your way. Design your own tags for free and print them at home. Sell to your own neighborhood first. Price your work so it pays you. Let the profits buy the next tool. Save the big purchases for when you can name how they will pay you back.
And when icing runs off a cookie, or a batch is not perfect, remember: I’m not a pro baker, just winging it — and winging it, one small season at a time, built all of this.
You can build yours, too.
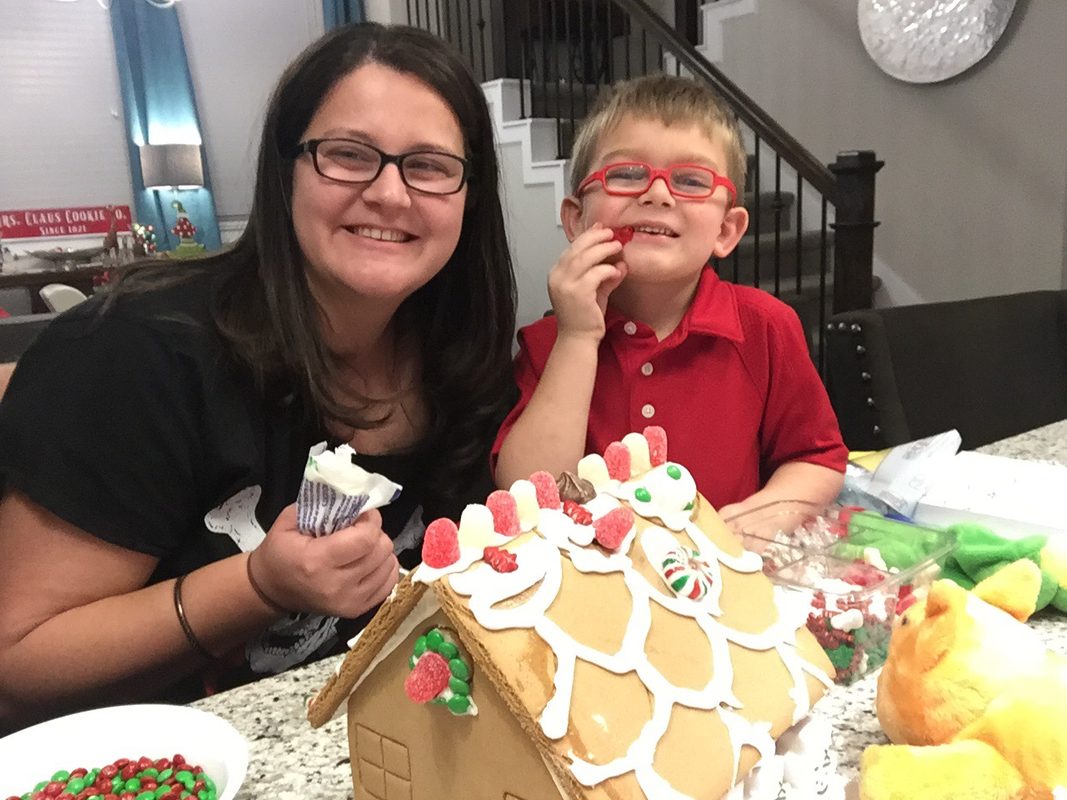
Just add sprinkles.
Looking for the whole path in one place? Go back to Part A — Start Here: Get Legal → Start Small → Price It Right → Package It Cute & Legal → Get First Preorders → Grow Slowly.
